Integrating GitHub with VS Code
To work more effectively with GitHub, it’s essential to integrate it with an IDE like VS Code. There are two ways to do this:
Method 1: Local Setup
This method involves installing Git on your local machine and using the GitHub Pull Request and Issues extension in VS Code.
Steps to Set Up Git with VS Code:
-
Install Git (Version Control System) (if not installed)
- Download and install Git from Git Downloads.
- After installation, verify the installation by running:
git --version
-
Configure Git
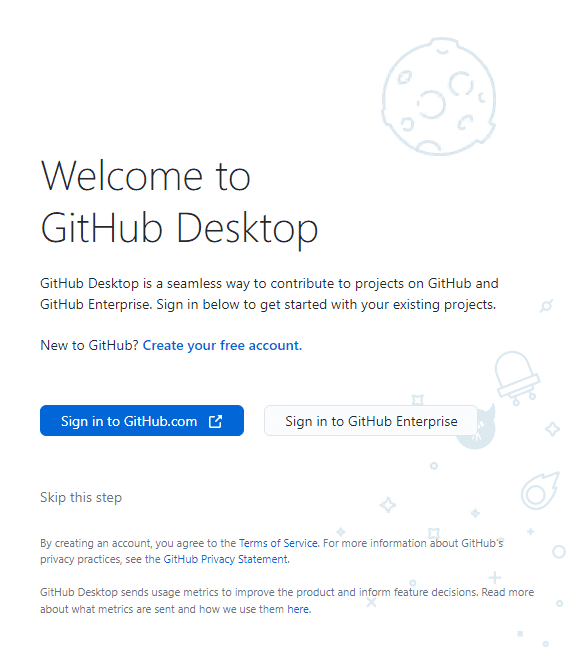
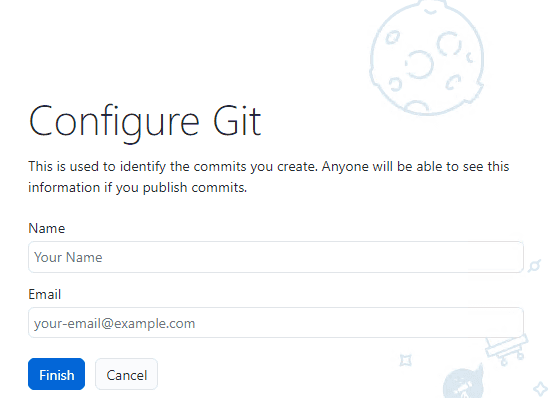
After installing Git, you need to configure Git by providing your full name and email address.You can start GitHub Desktop (if you have it already installed in your personal device) and configure using the graphical user interface as shown in the diagram below or use the command line.
Configure Git with command line
- Open Git Bash.
- Set your username and email, which will be associated with your commits. Use these commands, replacing "Your Name" and "your.email@example.com" with your actual information:
git config --global user.name "Your Name"
git config --global user.email your.email@example.com
Check your Git Configuration
git config --list-
Install VS Code (if not installed)
- Download it from Visual Studio Code.
-
Install GitHub Pull Request and Issues Extension
- Open VS Code and go to the Extensions Marketplace (
Ctrl + Shift + X/Cmd + Shift + Xon macOS). - Search for GitHub Pull Requests and Issues and install it.
- Alternatively, install it directly from VS Code Extensions.
- Open VS Code and go to the Extensions Marketplace (
-
Authenticate GitHub in VS Code
- Open VS Code and navigate to:
View > Command Palette (Ctrl + Shift + P / Cmd + Shift + P on macOS) - Search for "GitHub: Sign in to GitHub" and follow the prompts.
- Open VS Code and navigate to:
-
Clone a GitHub Repository into VS Code
- Open VS Code and open the Command Palette.
- Select "Git: Clone" and enter the repository URL from GitHub. (Example Repo Link: https://github.com/Laurea-amk-Leppavaara/github-starter-space)
- Choose a local folder to save the repository and start coding.
Read More: For full instructions, refer to the official VS Code guide: Collaborate on GitHub
Method 2: Using GitHub Codespaces (Cloud-Based IDE)
GitHub Codespaces is a cloud-based development environment that allows you to code directly in your browser without installing anything locally.
Benefits of GitHub Codespaces:
- No installation required
- Access your code from any device
- Standardized development environment
How to Use GitHub Codespaces:
- Go to your GitHub repository.
- Click the "Code" button and select the "Codespaces" tab.
- Click "New codespace" to launch a fully configured VS Code environment in your browser.
Watch this short video on how to use GitHub Codespaces:
For more details, visit the official documentation: GitHub Codespaces
Which Method Should You Use?
- Use the local method if you prefer working locally and need full control over your development environment.
- Use GitHub Codespaces if you want to code from anywhere without worrying about installations.
Basic Git Command Line Reference
Here are some essential Git commands to get started:
| Command | Description |
|---|---|
git --version | Check if Git is installed |
git config --global user.name "Your Name" | Set your Git username |
git config --global user.email "your-email@example.com" | Set your Git email (must match GitHub) |
git config --list | View your Git configuration |
git init | Initialize a new Git repository in a folder |
git clone <repo-url> | Clone a repository from GitHub |
git status | Check the status of your working directory |
git add <file> | Stage a file for commit |
git add . | Stage all modified files for commit |
git commit -m "Your commit message" | Commit changes with a message |
git log --oneline --graph --all | View commit history in a readable format |
git branch | List all branches in the repository |
git checkout -b <branch-name> | Create and switch to a new branch |
git merge <branch-name> | Merge a branch into the current branch |
git push origin <branch-name> | Push changes to GitHub |
git pull origin <branch-name> | Pull the latest changes from GitHub |
git remote -v | Show linked remote repositories |
git reset --hard <commit-id> | Reset to a specific commit (dangerous, use with caution) |
For a complete list of Git commands, check the official Git documentation: Git Command Reference
You can check your current points from the blue blob in the bottom-right corner of the page.

